User's Guide
Using the Editor
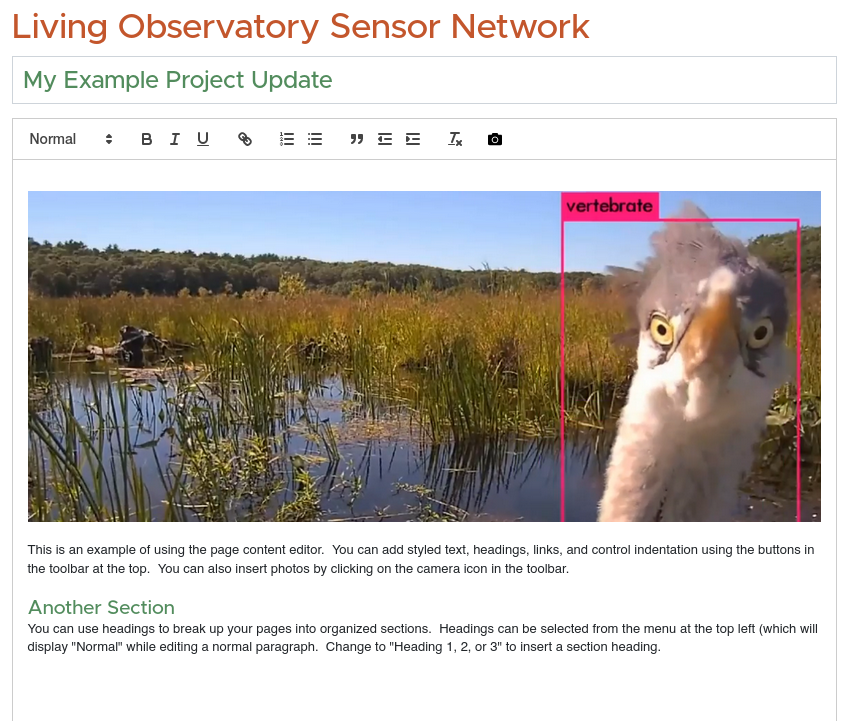
The page content editor appears anywhere on the site where you can edit freeform content. It is a WYSIWYG (what-you-see-is-what-you-get) editor that generally works like a word processor, with a few special features.
Text Formatting
The toolbar allows you to apply basic text formatting using the Bold, Italic, and Underline buttons.
Note: You can copy and paste formatted text from another program, such as a word processor, and most of the formatting will be retained. Note, however, that you cannot paste images. These must be uploaded as described below so that all of the catalog and credit information can be properly entered.
You can enter section headings by using the menu at the upper left. "Normal" is the default mode for entering regular paragraph text. You can change this to “Heading” to start a new section[1].
The chain link icon can be used to add hyperlinks to the text. Select the text that you want to become a link, then click the chain icon. Enter the URL where you want the link to go into the popup that appears, then click Save. You can edit the URL later (or remove the link) by clicking on it, which will make the pop-up with the URL reappear.
Bulleted lists, numbered lists, and block quotations can be formatted using the next three icons, and the indentation can be controlled using the next two.
The “Tx” button will remove all formatting from the selected text. (This is sometimes useful if you have pasted text from another program and it is incorrectly formatted).
Best Practices: Remember when you are formatting your pages that people now visit websites with many different types and sizes of devices. What looks good on a desktop computer may not work well on a small screen on a phone. Keep the formatting simple, using headings for clarity and styled text where appropriate. The editor deliberately provides a limited set of formatting options to ensure compatibility with as many devices as possible.
Adding Photos and Images
Photographs can be inserted in the editor by clicking the camera icon in the toolbar. Photos aren’t just inserted into individual pages; they also go into a site-wide database with metadata describing the photo.
When you click on the camera icon in the editor, you will be shown the Insert Photo dialog:
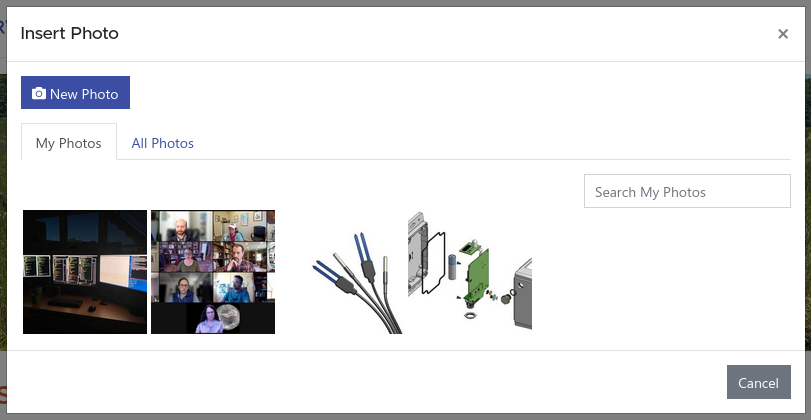
This window lets you insert an existing photo from the database or choose a new one to upload.
The “My Photos” tab shows the photos that you have recently uploaded. This is useful when you want to use the same photo in multiple places on the site. Clicking on a photo in this list will insert it into the page you are currently editing.
You can insert photos that have been uploaded by other users by switching to the “All Photos” tab.
On both the “My Photos” and “All Photos” tabs, you can use the search field to look for photos. This will search for matching text in the title, description, and credit information. The search feature is useful when you want to locate older photos.
To upload a new photo, click on the “New Photo” button at the top of the dialog box. This will prompt you to select a photo to upload. Once you have chosen a file (PNG or JPEG image[2]) you will see the Metadata screen. Here, you should provide a title for the photo as well as a description. You can also adjust the date the photo was taken, though in most cases this can be automatically determined from the file.
Tip: If you are accessing the site from a phone, the “New Photo” button will give you the option to open the camera and take a new photo to upload directly. This can be a handy way to quickly add photos to a project update while out in the field! You can create the update and upload a few photos from your phone, then return to it later on your computer to add the text and publish the update.
If you are not the photographer, you should edit the credit information to reflect who created the photo. Living Observatory defaults to a Creative Commons Attribution license for photos and data; if the photo is under a different license you need to specify that here as well.
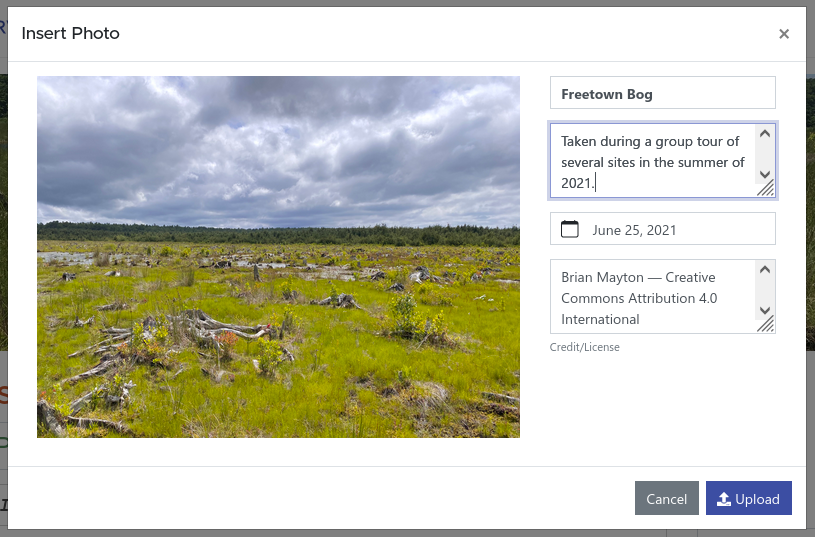
Tip: If you use software such as Adobe Lightroom to edit your photos, the title, description, and credit fields may be pre-filled from information embedded in the photo file.
Once you have finished editing the metadata, click on the “Upload” button to upload the photo and insert it into the page you are currently editing.
Adding Videos
You can’t upload videos directly to Living Observatory, but you can embed videos hosted on other services. Currently YouTube and Vimeo are supported.
To add an embedded video, click the video camera icon in the editor toolbar. This will bring up a dialog where you can paste a video URL.
Note that when you are editing a page/update, the video will show a static poster frame and title. Once you save the page and view it, the playback controls will become active allowing you to watch the video in the page.
Adding Database Objects
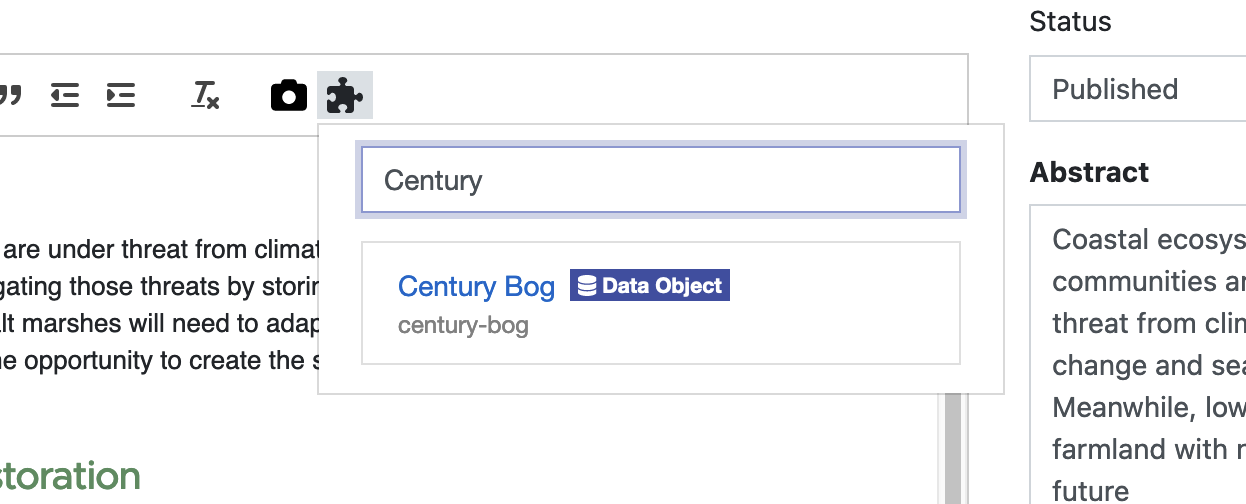
The editor also supports adding links to objects in the database, such as projects, properties, and sampling locations. These appear as clickable blocks with a thumbnail and title that will take a visitor to the appropriate page.
To insert an object, click on the puzzle piece icon in the editor toolbar. A search drop-down will appear, where you can start typing a few letters of the item you would like to insert. The search results will appear automatically below the text box. Once you see the item you want, click on it to insert it into the editor.
Object links will appear as blocks in the editor:
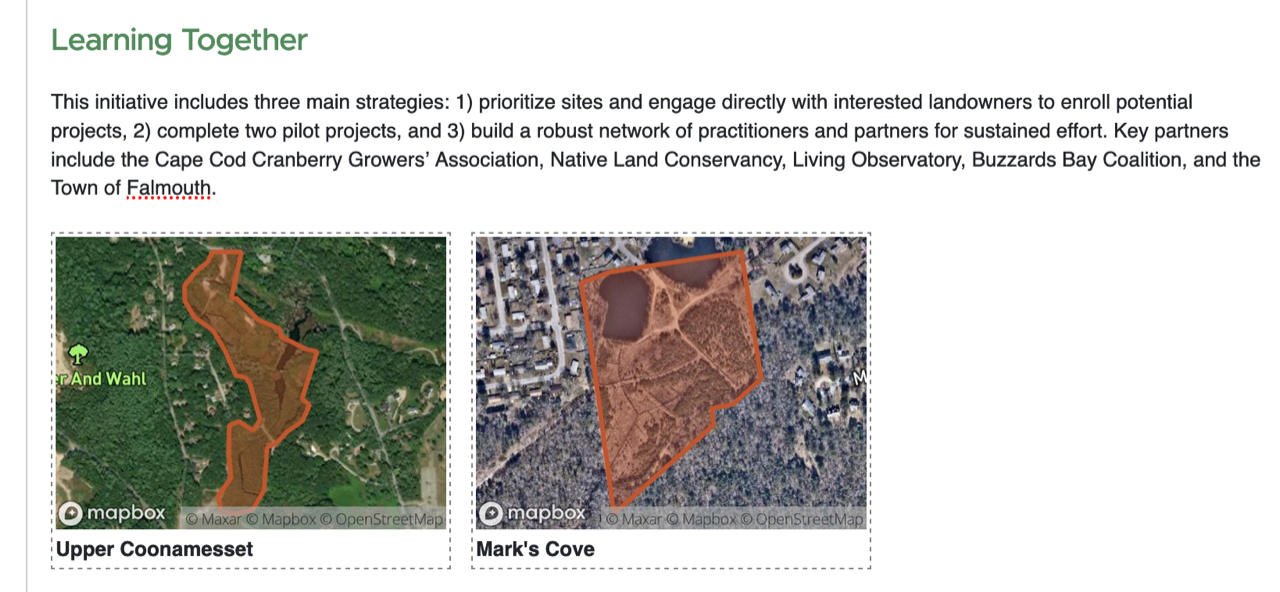
For projects, the thumbnail will be the poster image provided by the project’s owner. Geographic entries such as properties and sampling locations will appear as a map image showing the outline or point that represents the location. These images (and the titles) will be automatically updated if the project/object is updated.
The dashed outline indicates that these are complete blocks in the editor. You can move them around or delete them, but the title text inside cannot be edited. Once you leave edit mode, these appear on the page without the dotted outline and become clickable.
Note: Avoid linking to private or draft projects, as most visitors to the site will be denied access to view these. Wait until the project is public before including it.
Since most pages have a title defined outside of the editor which is styled as Heading 1, you generally should start headings in the editor with Heading 2, but you may use the headings as you see fit. ↩
Some image formats, such as HEIC, are not supported. Please convert these to JPEG before uploading. ↩